Don't overcomplicate git 🙇♂️
permalinkI recently talked to someone who was confused by git commands in the terminal, and it was just not working.
I again was confused about why this person was trying to push a simple commit using terminal commands?
Call me lazy, but there are visual tools to do just this for you.
In this case, the person wasn't aware of these, so I'm writing this article.
Use the right tools for the right job.
Don't get me wrong, I can commit and do a lot of stuff with the git terminal commands, but why not leverage visual interfaces?
Today I'll show you two ways to create commits not having to open your terminal!
Note: The article is based on Mac, there might be a difference for Windows interface.
1. Using Visual Studio Code permalink
My goto editor Visual Studio Code comes with a build-in git interface, and it's so simple to push and commit code.
Let me show you how it works.
Step 1. Finding the git window permalink
To find the git window click the "tree" icon on the left, you will see all your changes that haven't been committed yet.
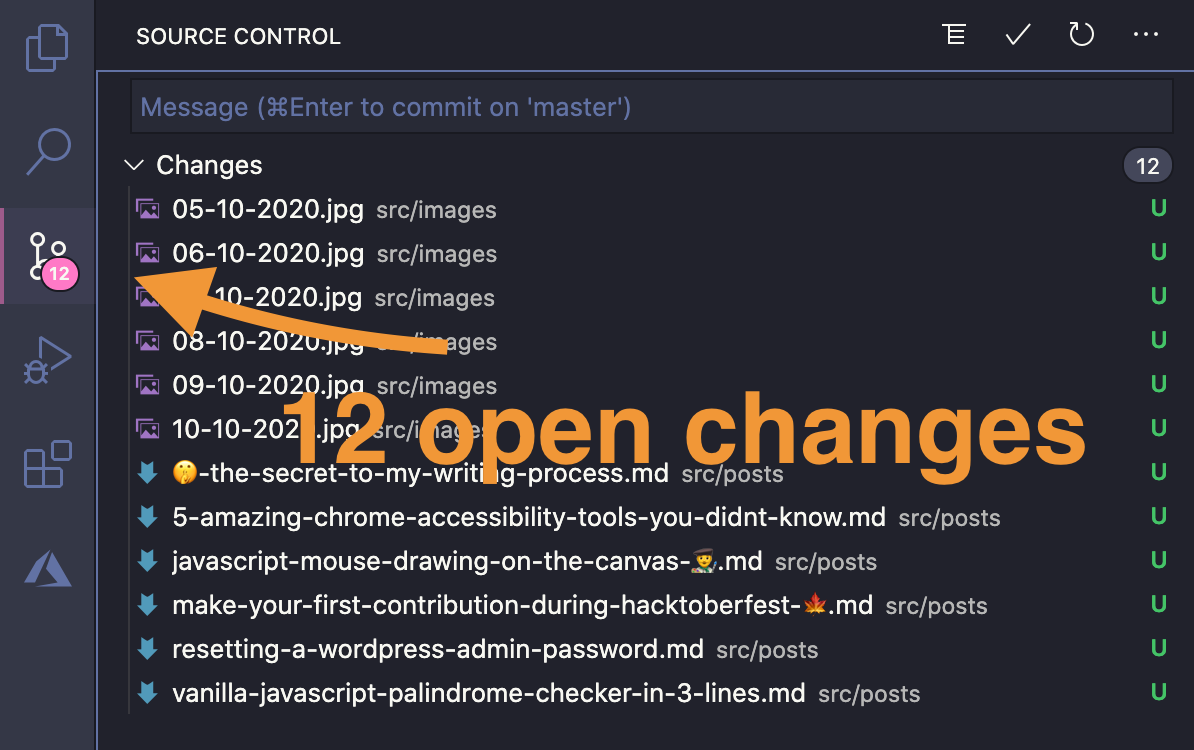
Here we see all our changes that are not yet committed.
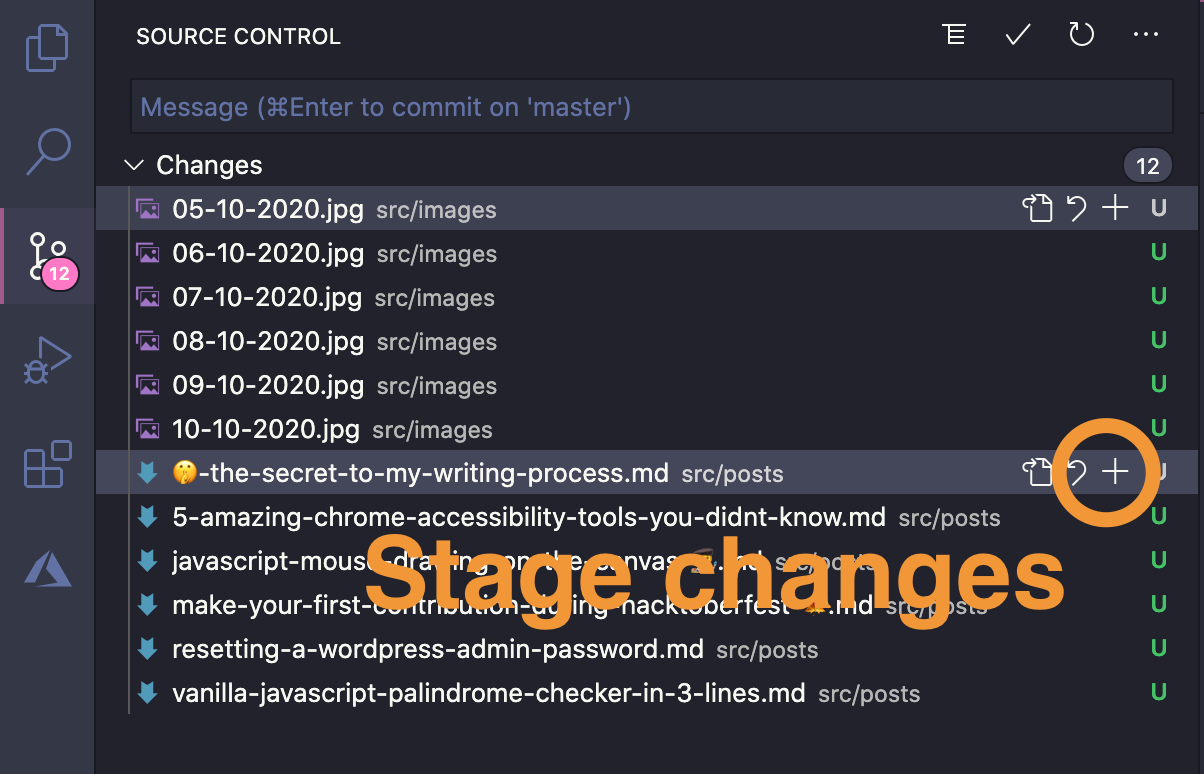
Step 2. Selecting files to commit permalink
You have the option to either commit all files (default) or choose which files you want to commit.
In my case, I'll only commit the files that need to go live.
Click the little plus if you hover a file.
Once we clicked this plus, it will look like this.
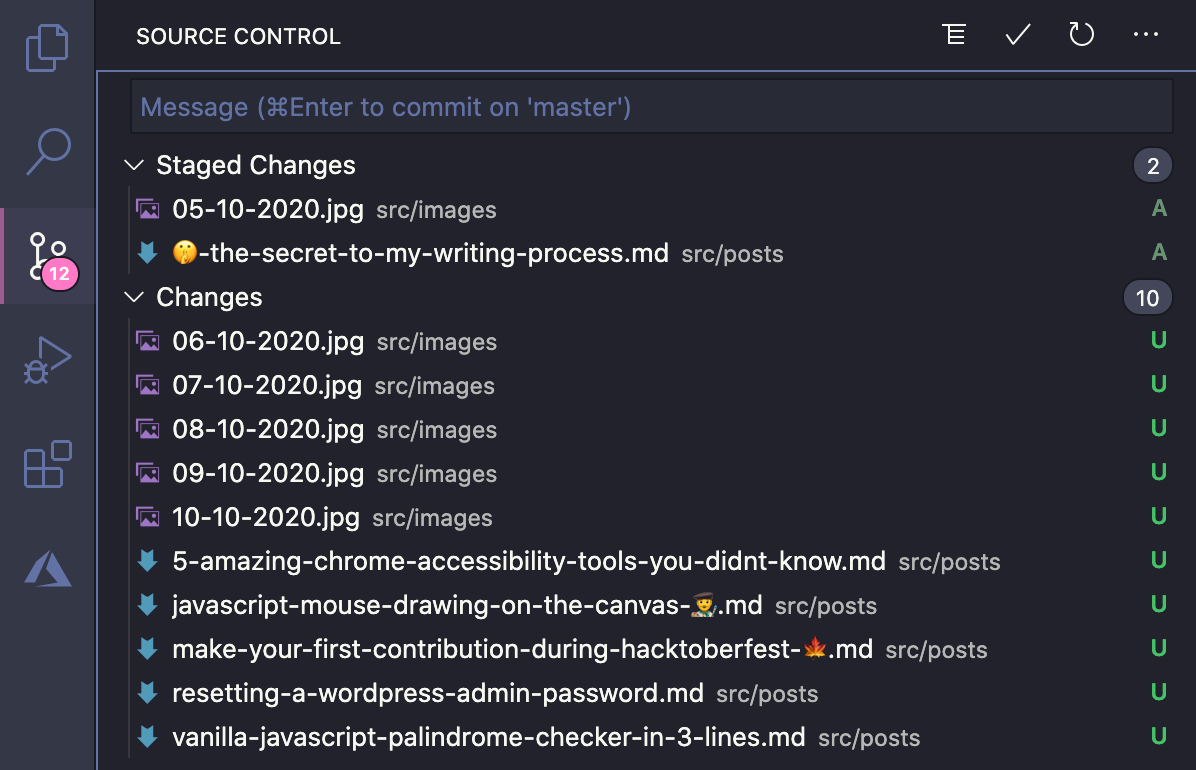
Only the top two files will be committed now. The other ones will stay on our local machine for now.
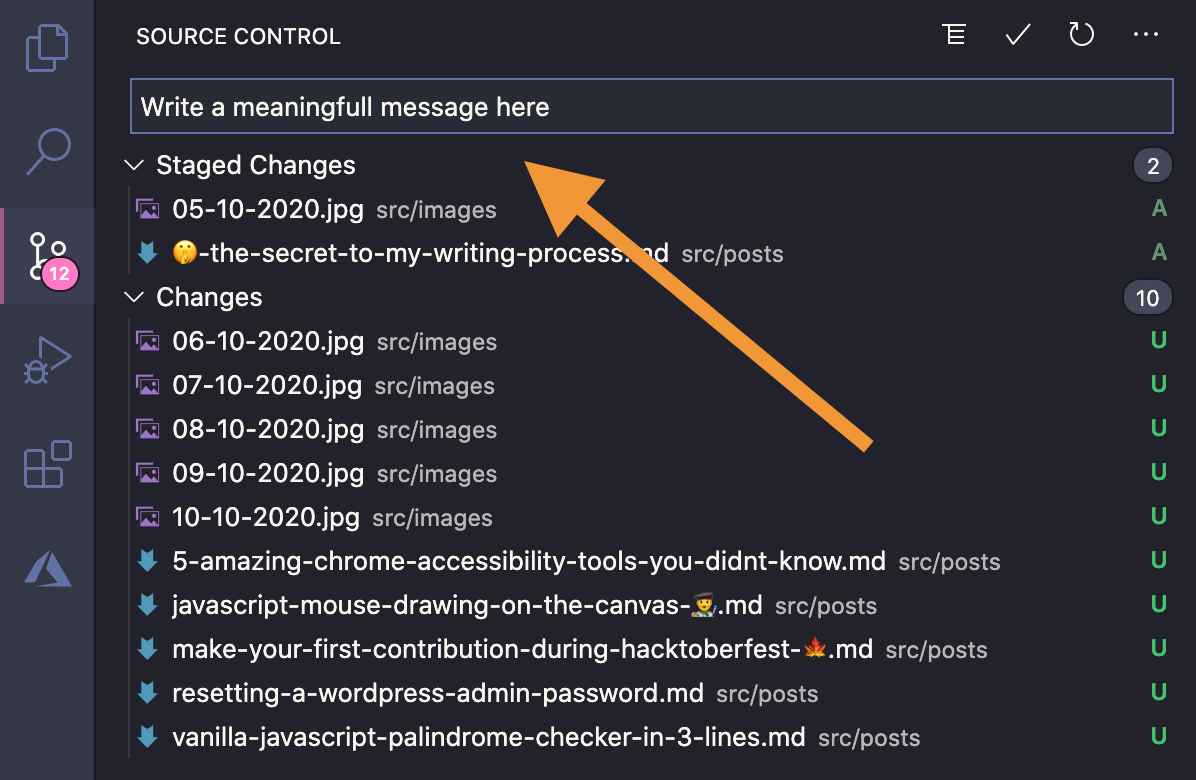
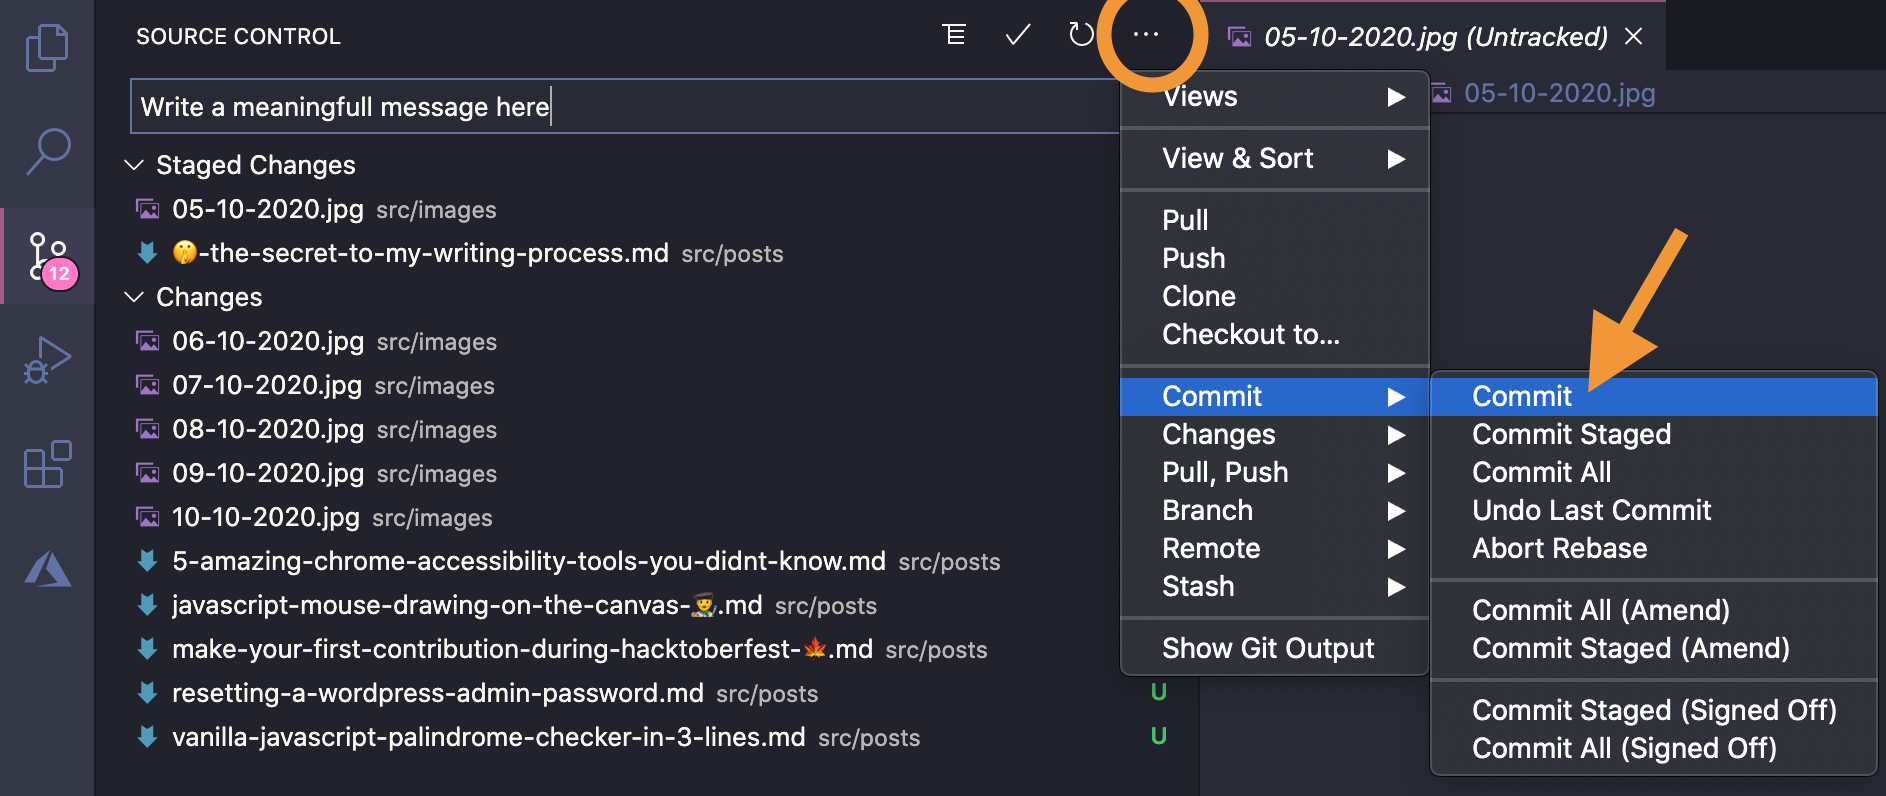
Step 3. Writing the commit message permalink
In the box up top, you'll see "message" this is where you write the commit message.
Step 4. Commit your changes permalink
Ok, now it's time to commit. There are two ways of doing that.
- Click the checkmark icon
- Or click the three dots -> Commit -> Commit
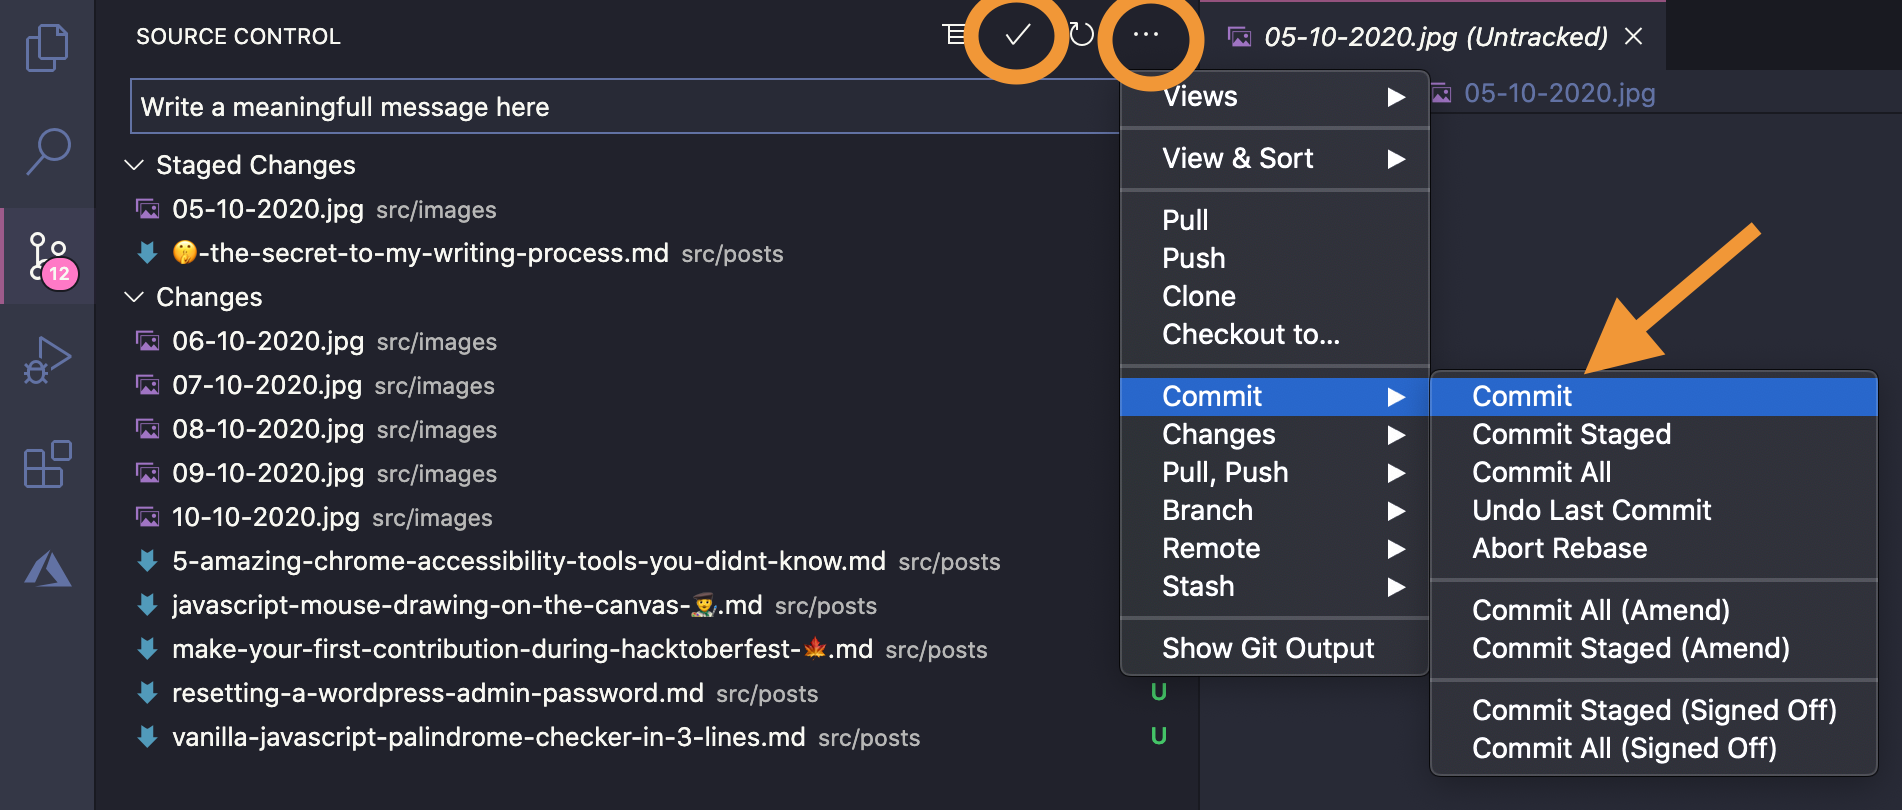
Step 5. Pushing the commit permalink
The last step in this process is to push the commit we just did.
Click the three dots again -> Commit -> Commit
That's it. We now did a visual commit to GitHub via Visual Studio Code.
2. Using the GitHub app permalink
Another way to do this is by using the GitHub app, which has a similar experience.
Download the GitHub desktop application first.
Step 1. Selecting the repo and files to commit permalink
First, make sure you're on the right repository, or add it by browsing for the folder on your machine.
Then select the files you want to commit (Default is all)
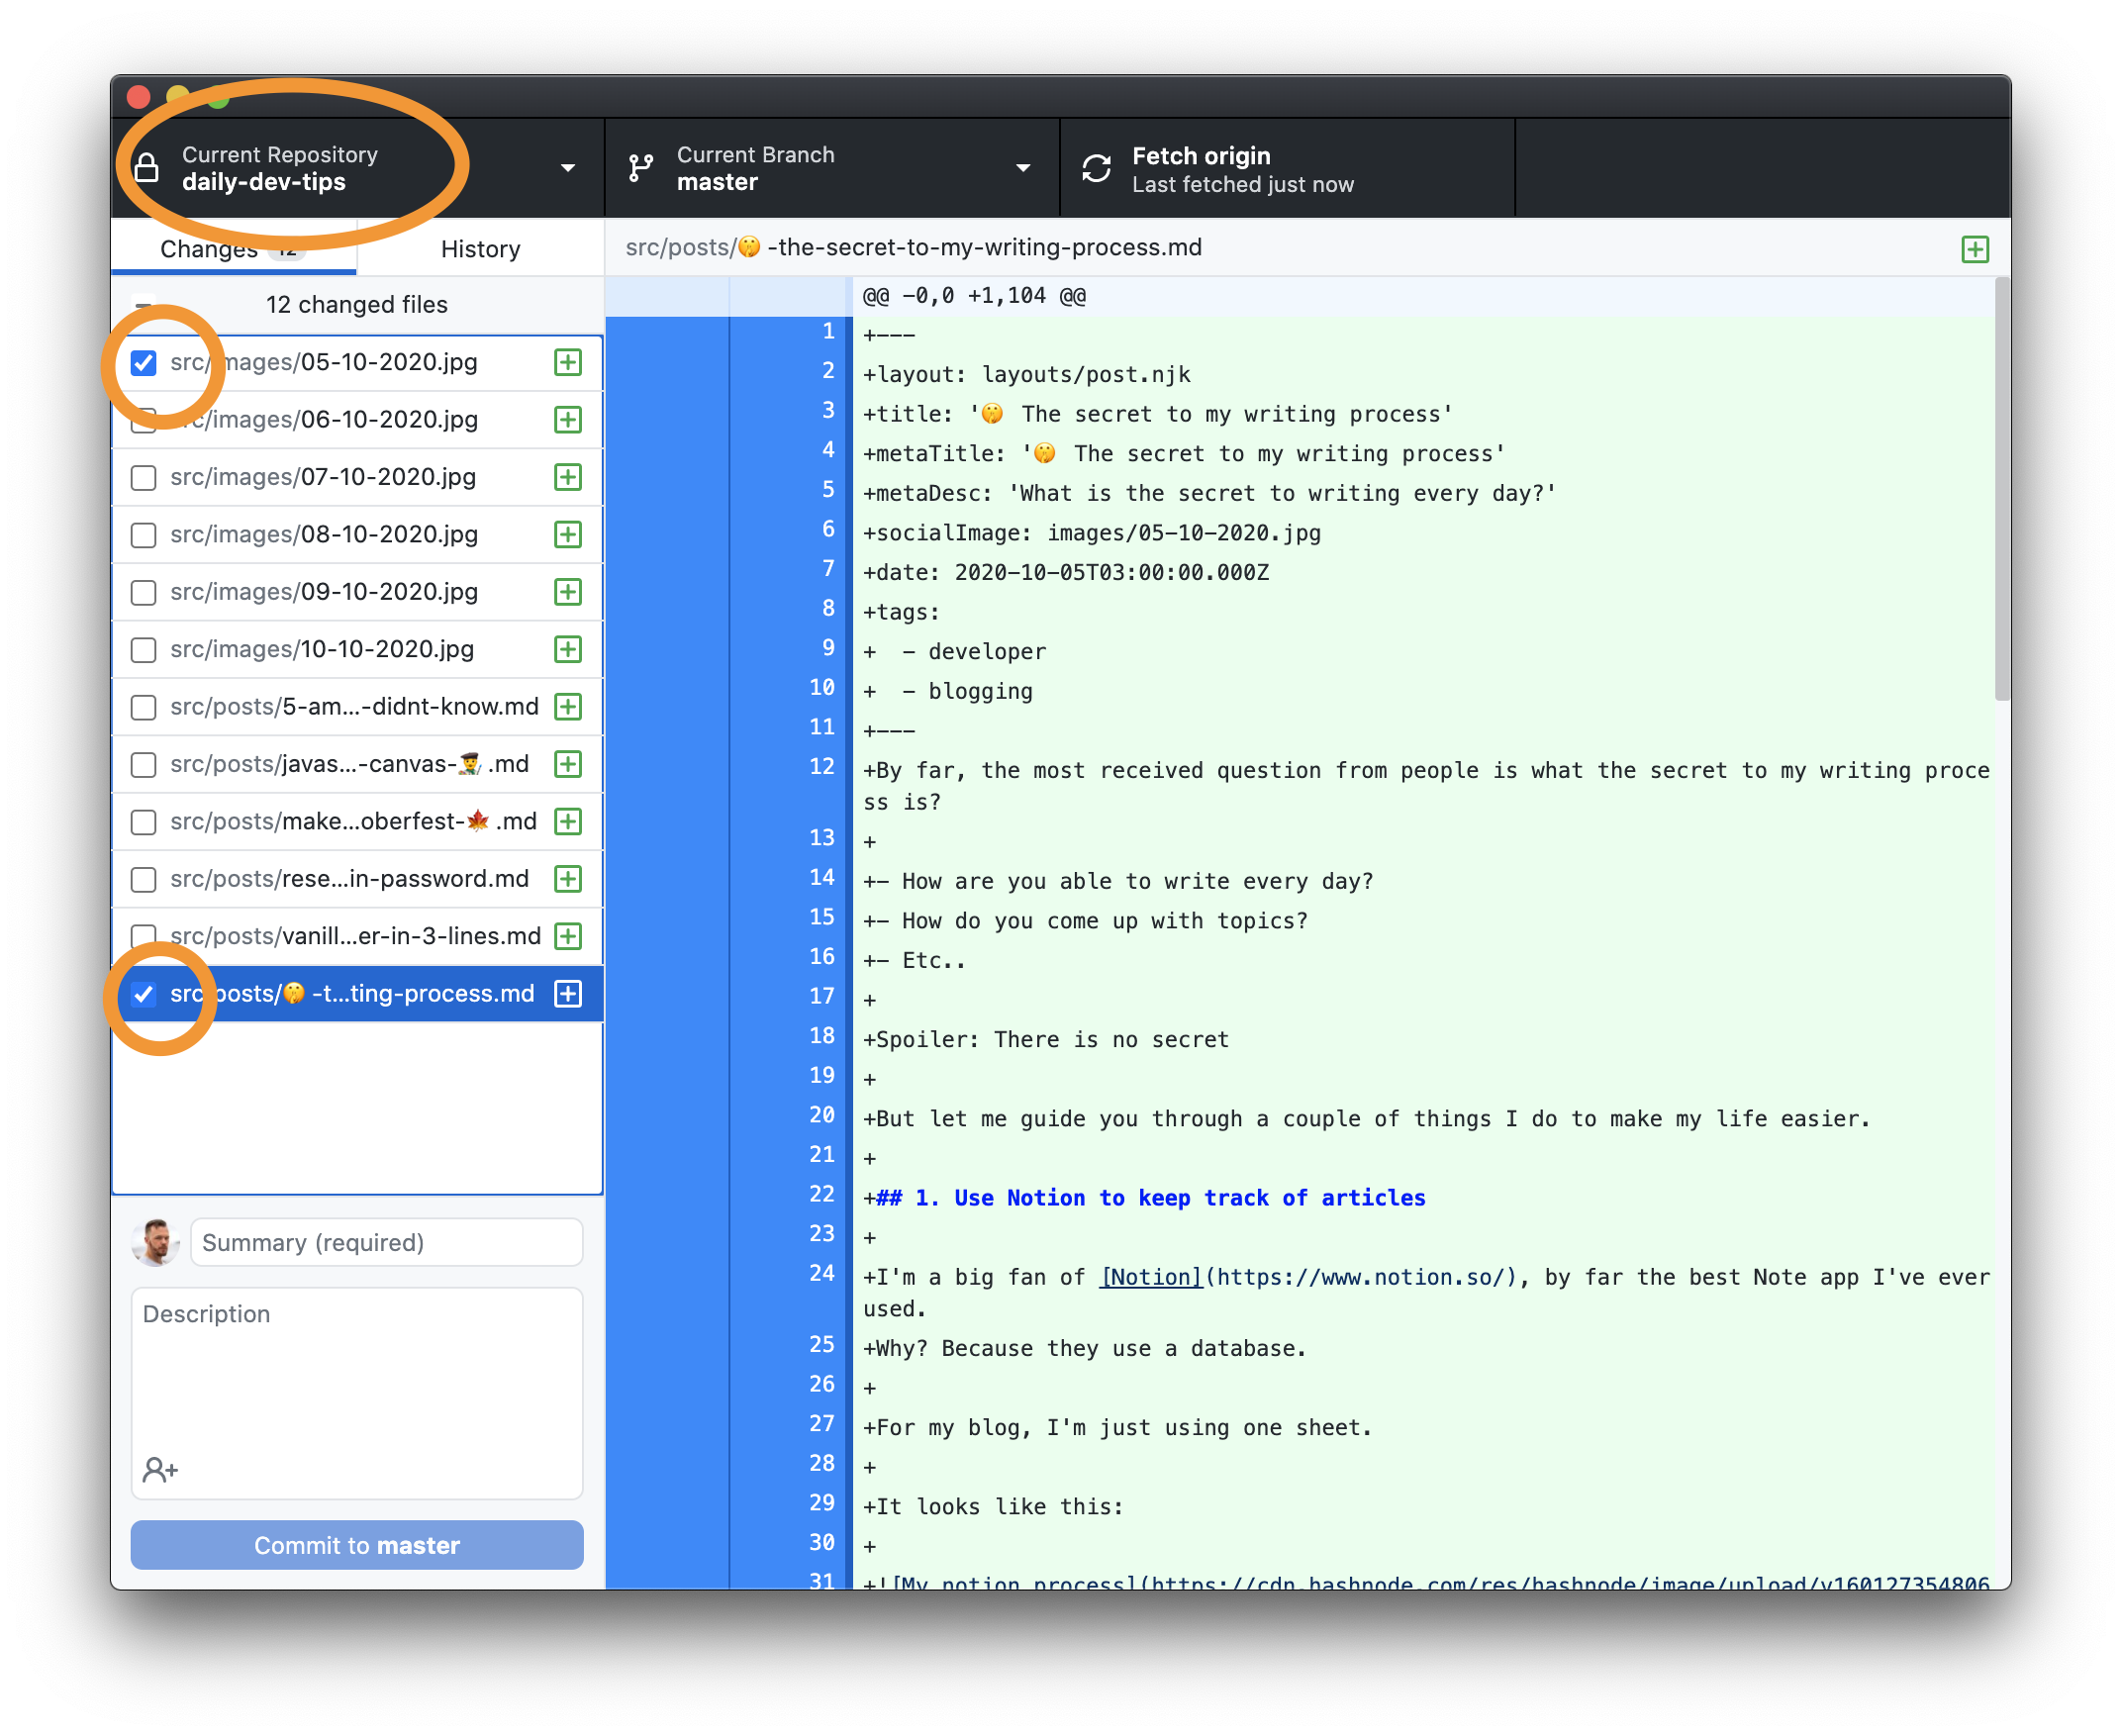
Step 2. Writing the commit message permalink
We can then add our commit message and even add a description.
You see the little commit box at the left bottom of the application.
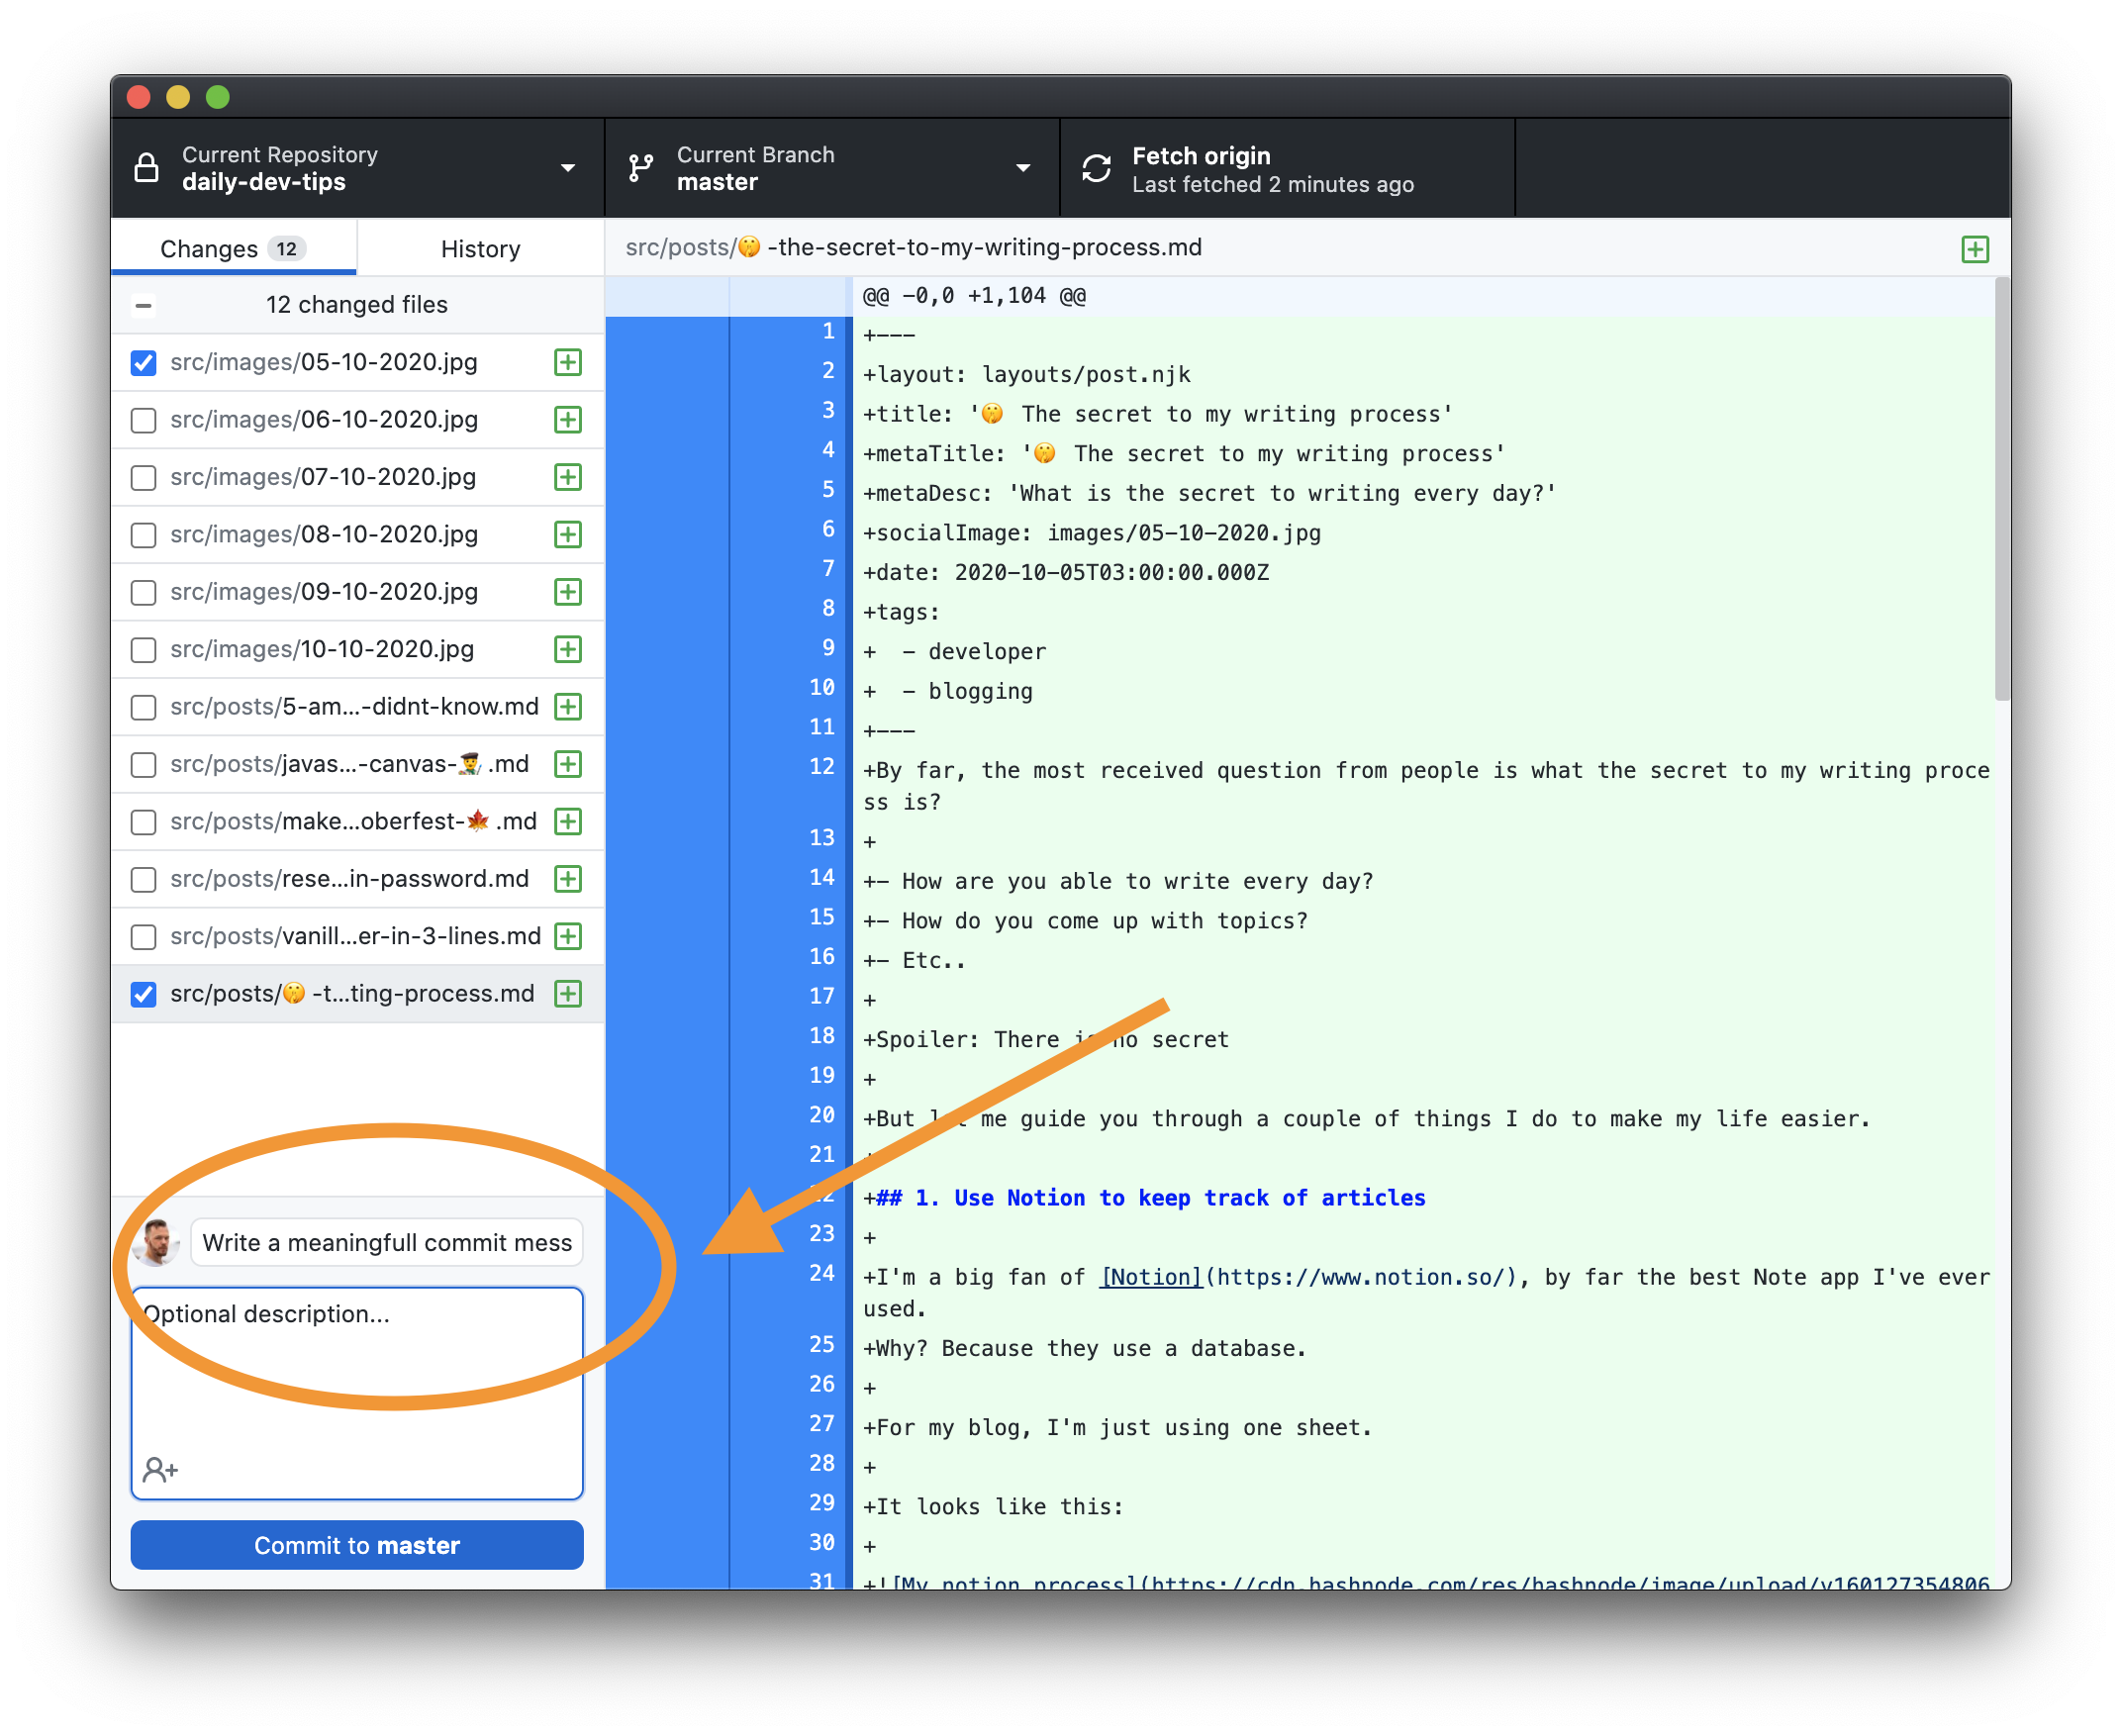
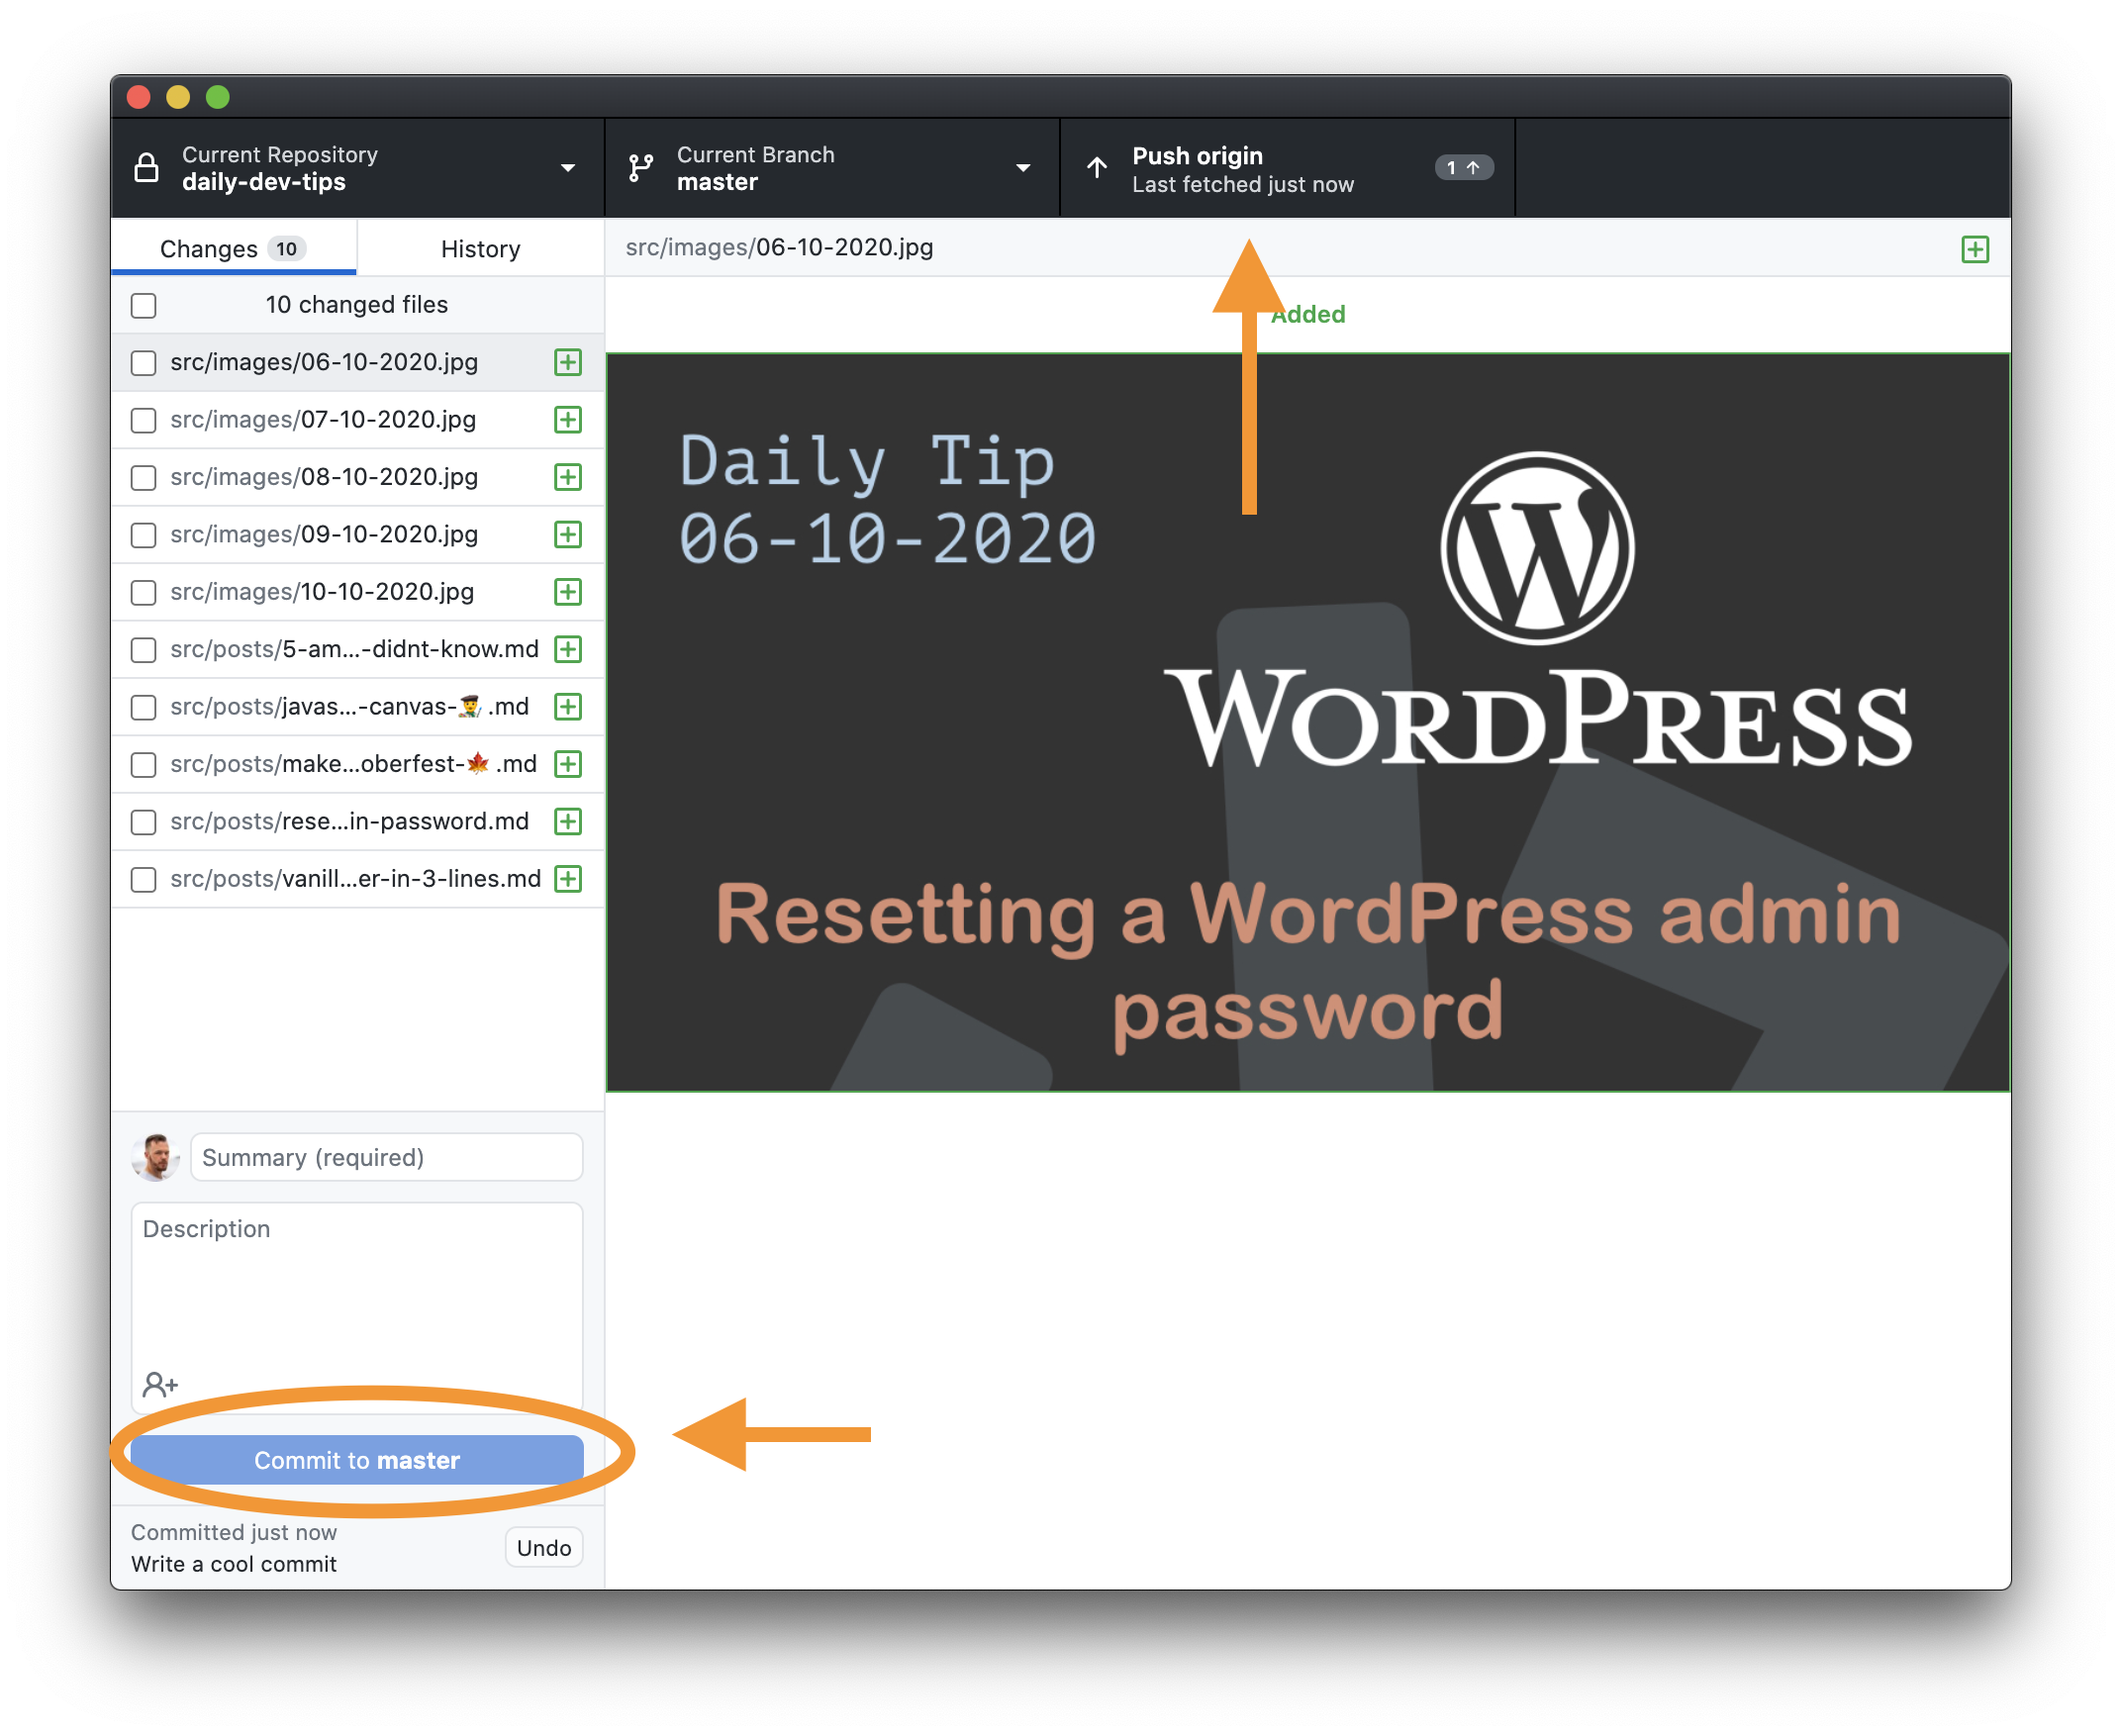
Step 3. Commit the files permalink
The next step is to commit the files.
Click the big button at the bottom.
Once you clicked that, the commit will be set. You'll see the number of commits on top now.
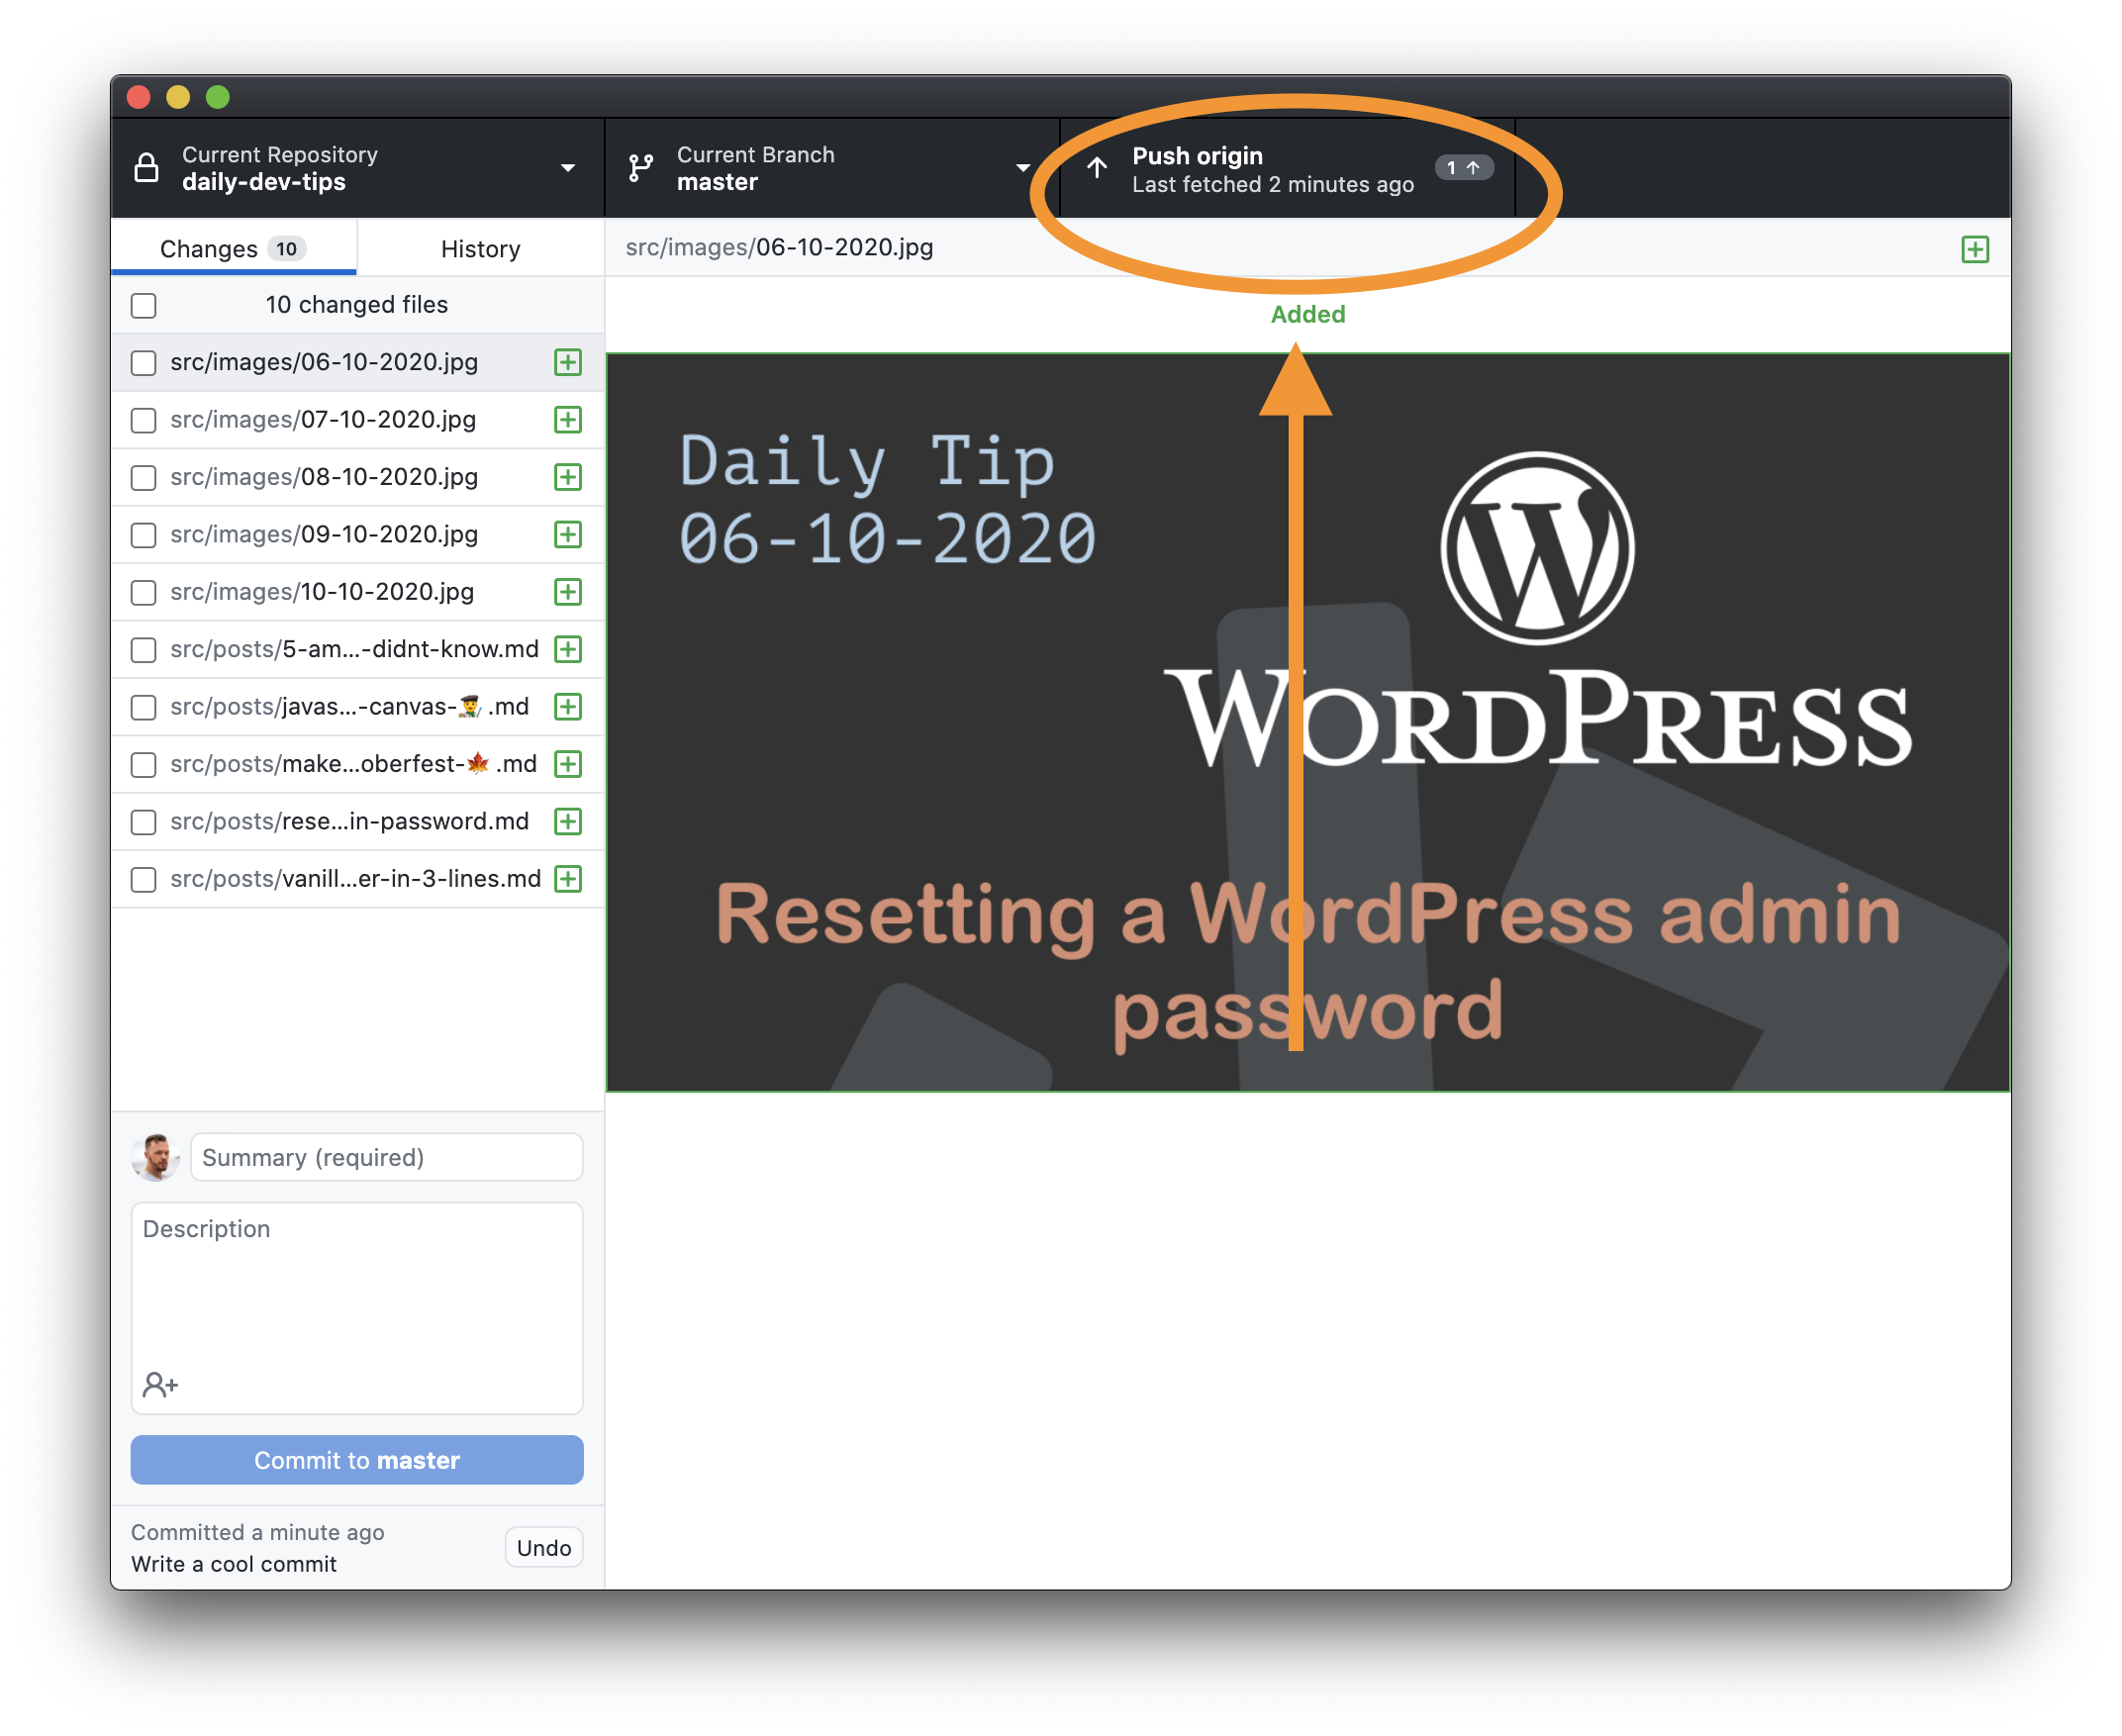
Step 4. Push the commit permalink
Now we can click the button up top to push the actual commits.
You can push multiple commits at once.
That's all. We now saw two ways to commit using a visual interface!
Thank you for reading, and let's connect! permalink
Thank you for reading my blog. Feel free to subscribe to my email newsletter and connect on Facebook or Twitter